Posts Tagged Appetizer
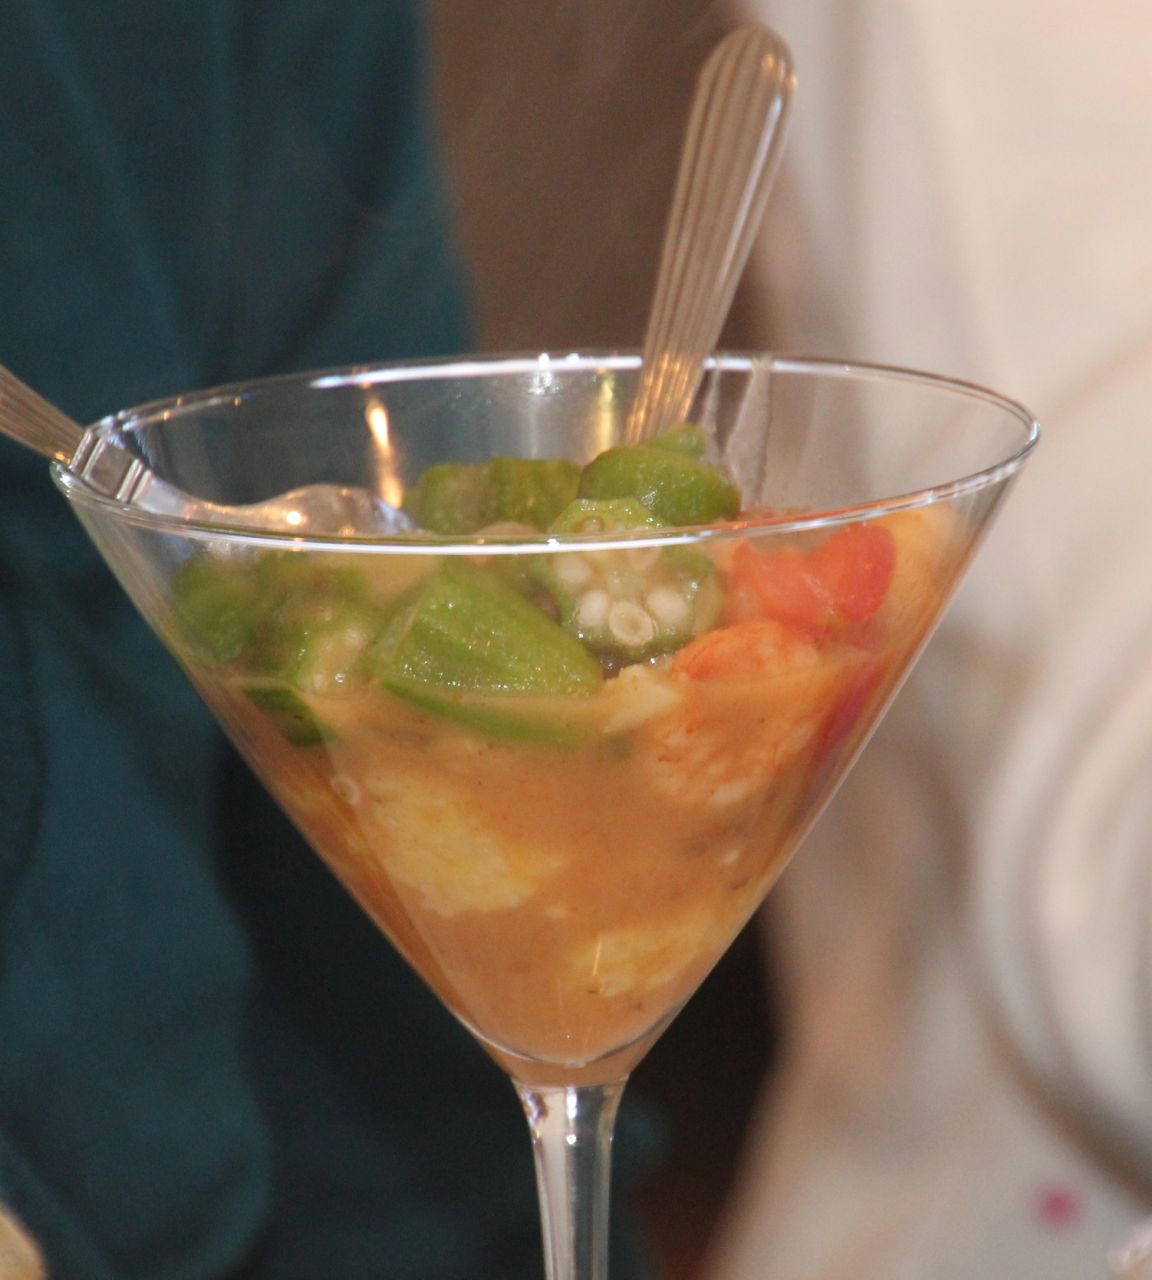
GUMBO GRAVY OVER STONE-GROUND GRITS
Posted by patandkrislarkin in Uncategorized on February 4, 2013
I started my process of thinking through the menu for this cooking class with the idea that I was going to make shrimp and grits. As I pursued recipes and thought about the best thing for the class (and something I had never made before) I came up with this “Gumbo Gravy of Stone-Ground Grits”. It is sort of a shrimp and grits on steroids! I love the gumbo-ish texture to it and the stone-ground grits will convert many would be otherwise . . . grit haters!
Let’s start cooking!

GUMBO GRAVY OVER STONE-GROUND GRITS
PREP: 15 minutes
Crockpot time: 2.5 hours
SERVES – 6 or more
Ingredients
• 1 pound large raw shrimp, peeled and deveined
• 1 1/2 teaspoons Cajun seasoning
• 6 ounces andouille sausage, diced
• Vegetable cooking spray
• 2 teaspoons vegetable oil 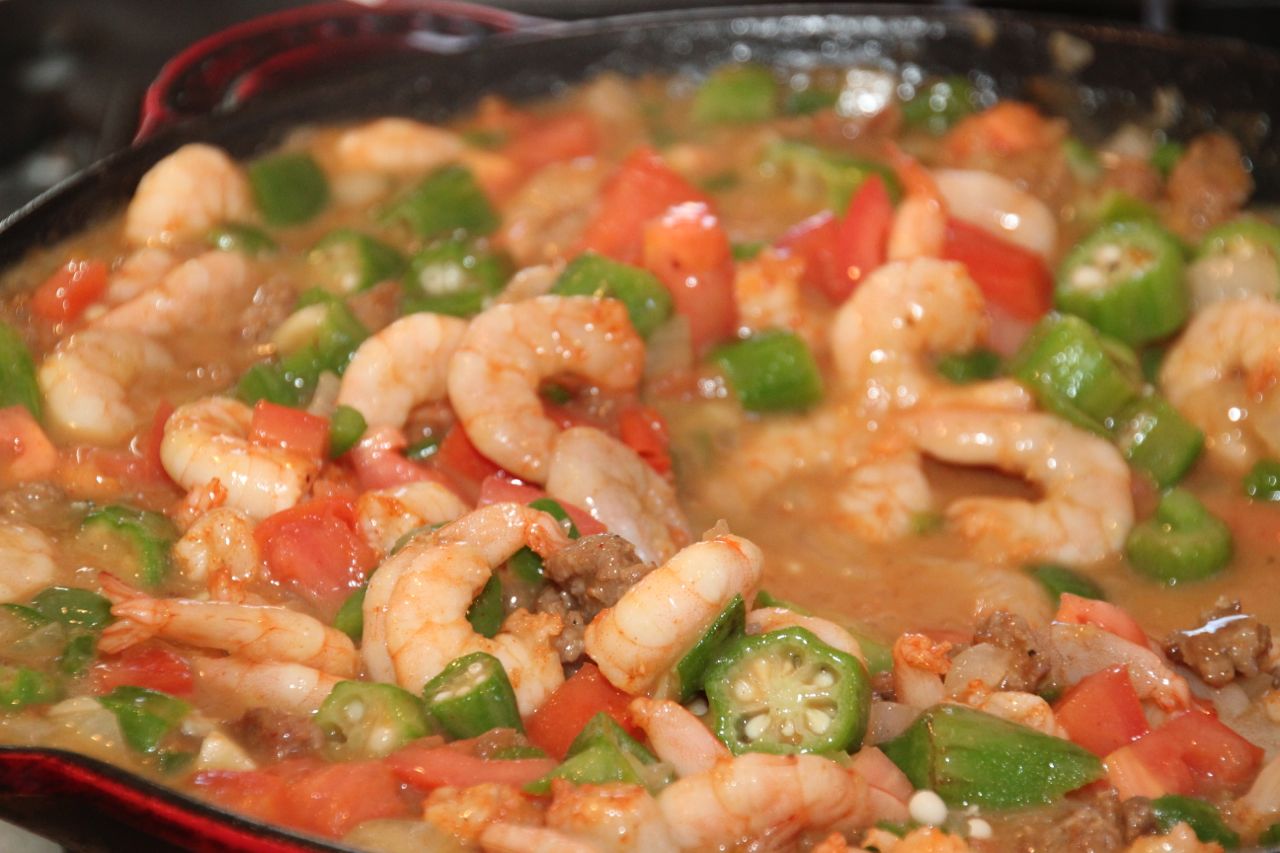
• 1 cup diced sweet onion
• 1/2 cup diced green bell pepper
• 2 garlic cloves, minced
• 3 tablespoons Browned Flour
• 1 cup reduced-sodium, fat-free chicken broth
• 1 cup sliced fresh okra
• 2 large plum tomatoes, peeled, seeded, and diced
• Slow-Cooker Stone-ground Grits
• Garnish: sliced green onions
Preparation
1. Toss shrimp in Cajun seasoning in a medium bowl.
2. Cook sausage in a large skillet coated with cooking spray over medium heat 5 minutes or until lightly browned. Add oil, onion, and next 2 ingredients; sauté 3 minutes or until tender. Sprinkle Browned Flour over sausage mixture; stir until blended. Stir in chicken broth, and increase heat to medium-high. Bring to a boil, stirring often, and boil, stirring occasionally, 3 minutes or until thickened. Add shrimp, okra, and tomatoes. Cook 5 minutes or just until shrimp turn pink. Serve over grits.
That’s all there is to it now . . . ENJOY!
Thank you as always for reading and for your support.
Kris
For more information about upcoming cooking classes and idealic lodging in the fabulous Flint Hills VISIT OUR WEBSITE!
SPICY STRATA
Posted by patandkrislarkin in Cooking and Baking on December 20, 2012
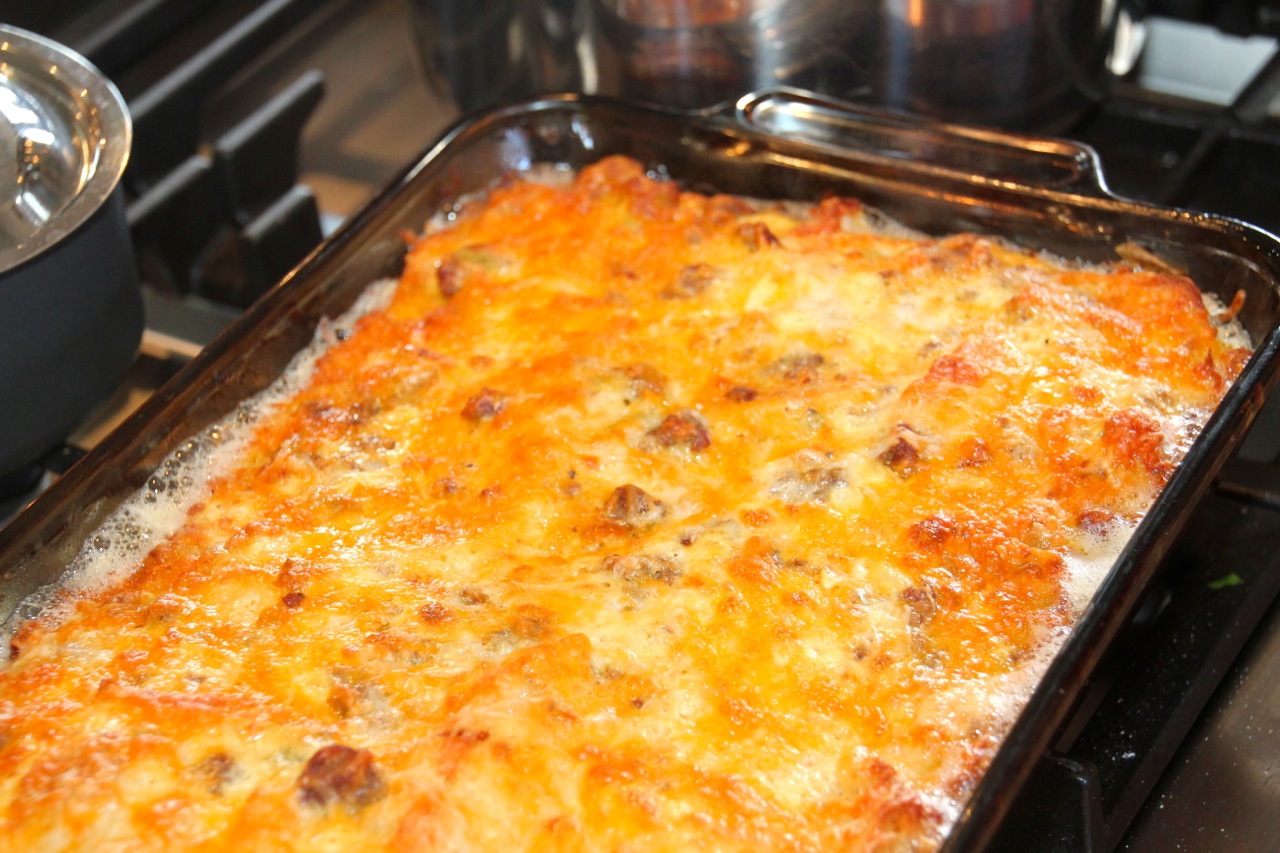
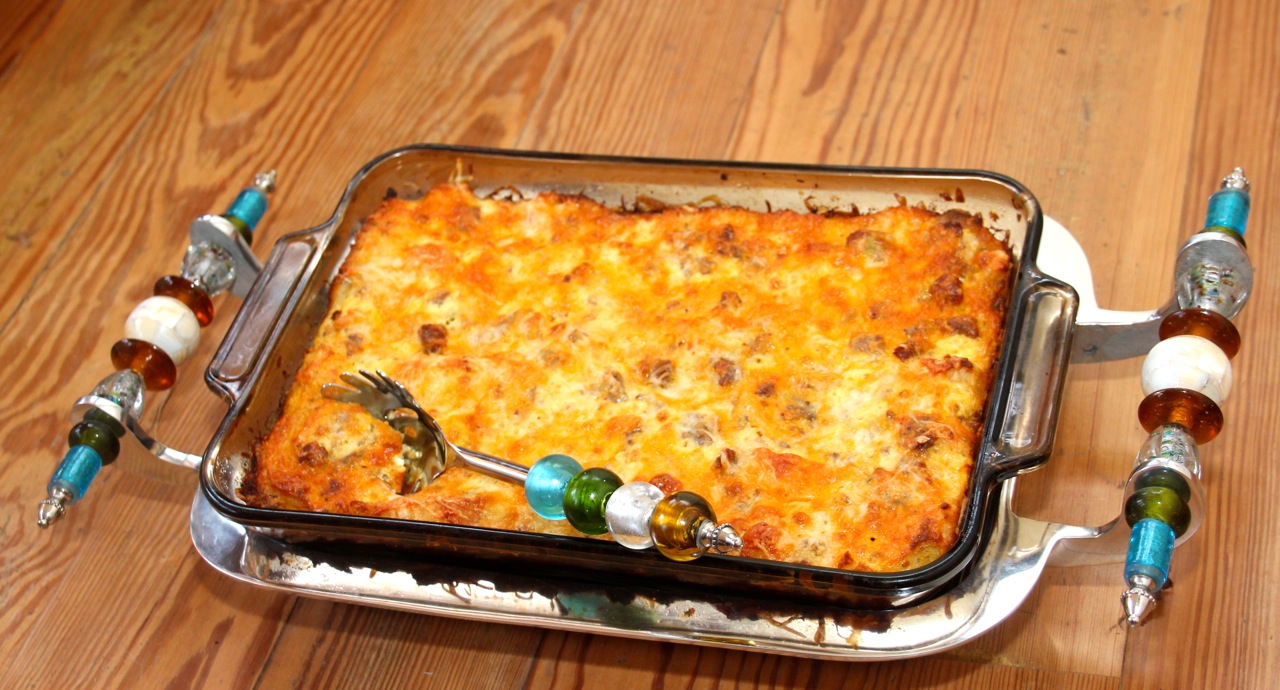
One of the all time great standards for serving brunch to the masses of your guests is egg strata. You remember, you mix it up the night before and stick it in the fridge. You left the fridge do it’s fridge magic, take it out in the morning and stick it in the oven for a little oven magic. When it’s done, all are happy and delighted. This is the same thing, an egg strata but this one is a spicy variation on the theme. It has just the right amount of kick . . . not so much that grandma can’t eat it but just enough that everyone will enjoy it. Try it with some salsa or pico de gallo and kick it up to any level you want.
The good news is that it’s easy and everyone will love it!
Let’s make our Spicy Strata!
SPICY STRATA
PREP: 20 minutes
INACTIVE PREP TIME: OVERNITE
BAKING TIME: 60 MINUTES
OVEN TEMP: 350 DEGREES
SERVES – 10
Ingredients:
1 pound of breakfast sausage – such as Jimmy Dean Sausage
1 – diced onion (Vidalia or sweet onion if possible)
1 small can of diced green chilies
1 small can of diced jalapenos (optional)
2 cups of grated cheddar cheese or pepper jack
12 eggs
1 1/12 cup milk
1-teaspoon dry mustard
1-teaspoon salt
1-teaspoon black pepper
6-8 slices of French bread or ciabatta bread
Directions:
1. Grease a 9X13 inch pan – I use butter to grease pan.
2. Cook onions and sausage in skillet. Drain off the grease.
3. In a large bowl, mix eggs, milk, mustard, salt and pepper.
4. In your baking pan, layer your bread slices first
5. Top with sausage and onion mixture, chilies and egg mixture (add one cup of the grated cheese with eggs- reserving 1 cup for the top of the casserole)
6. Cover and refrigerate overnight.
7. Bake at 350 degrees, uncovered for one hour. Let stand for 5 minutes before serving.
I have found this is best served as a buffet, but it really doesn’t matter . . . they will be coming back for it either way!
As always, thank you for reading and have a blessed Christmas and holiday season!
Kris
For information about our Upcoming Cooking Classes at The Lark Inn or a Relaxing Get-a-Way in the Gorgeous Flint Hills of Kansas, click on either of those links.
![]()
HONEY ALMOND GRANOLA
Posted by patandkrislarkin in Cooking and Baking on December 13, 2012
With the Christmas and Holiday season being so busy, we all need good protein-packed fuel. How else will you ever get done . . . Christmas Programs at the kids’ schools . . . shopping . . . special time with friends and relatives . . . more special programs at the kids’ schools . . . more shopping . . . you get the idea.
My Honey Almond Granola definitely fills the bill . . . it’s protein-packed . . . it tastes delightful and it’s easy to make . . . and the extra bonus . . . it will keep for a while!
I know you are busy so let’s get right into making our Honey Almond Granola!

HONEY ALMOND GRANOLA
PREP: 35 MINUTES
COOK TIME: 30 MINUTES
OVEN TEMP: 325 DEGREES
YIELDS: 9-10 CUPS
Ingredients
- vegetable oil cooking spray

- 4 cups old fashioned oats, not quick-cooking
- 1 cup oat bran
- 2 cups whole almonds, coarsely chopped
- 3/4 cup vegetable oil
- 3/4 cup honey
- 1 tablespoon vanilla extract
- 1/2 teaspoon almond extract
- 1 cup nonfat dry milk powder
- 1/2 teaspoon salt
- 1 cup raisins

Directions
- Position racks in the upper and lower thirds of the oven and heat oven to 325°.
- Spray two baking sheets with vegetable oil spray or line baking sheets with parchment paper.
- In a large bowl mix the oats, bran, and almonds.

- In a smaller bowl, whisk the oil, honey vanilla, almond extract, dry milk powder, and salt.
- Pour the mixture (it will be gloppy) over the oats and stir, with your hands or a spoon, until well combined.
- Divide the mixture between the two oiled baking sheets and spread in an even layer.
- Bake for twenty minutes, stir the granola and switch the positions of the pans.
- Bake until the oats are golden brown and almonds look well toasted another 10 to 20 minutes; don’t overcook.
- Let cool completely in the pans.
- The oats may feel soft but will get crisp as they cool.
- When completely cool, stir in raisins.

The granola will keep for about 3 weeks if it lasts that long!
Now the best part . . . ENJOY!!
As always, thank you for the blessing of sharing my passion of cooking and serving others. Stay tuned for more great Christmas/Holiday recipes!
Kris
ROSEMARY CASHEWS
Posted by patandkrislarkin in Cooking and Baking on December 10, 2012
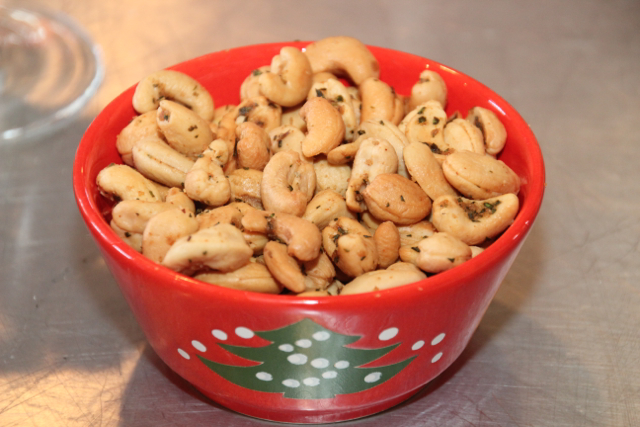
Well it’s Holiday season and to me, nothing says holiday appetizer like Rosemary Cashews. My good friend Velda came to a Christmas party at my home several years ago and enlightened me as to the wonderfully unique flavor these cashews have as well as how simple they are to make. The rosemary adds a flavor like nothing else, and then you add to that, the saltiness and the slight kick from the ceyenne pepper and WOW! Thank you Velda . . . your legacy lives on!
Let’s make Rosemary Cashews!
ROSEMARY CASHEWS
PREP: 5 MINUTES
ROASTING TIME: 5 MINUTES
OVEN TEMP: 350 DEGREES
SERVES: 5 TO 10
Ingredients:
1 LB. ROASTED UNSALTED CASHEWS
2 TABLESPOONS MINCED FRESH ROSEMARY
½ TEASPOON CAYENNE PEPPER
2 TEASPOONS LIGHT BROWN SUGAR
1 TABLESPOON KOSHER SALT
1 TABLESPOON UNSALTED BUTTER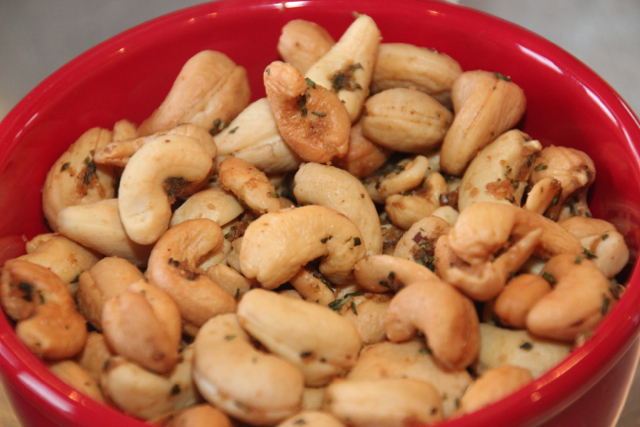
Directions:
1 Preheat oven to 350 degrees
2 Spread cashews out on a pan or cookie sheet
3 Toast in the oven until warm, about 5 minutes
4 In a large bowl, combine the rosemary, cayenne, sugar, salt and butter.
5 Thoroughly toss the warm cashews with the spiced butter
6 Serve warm
Wasn’t that easy?! Be sure you have this recipe handy when you serve these lest your guests will stalk you to get it!
As always, thank you for reading and Merry Christmas and Happy Holidays!
Kris
For information about our next cooking classes or to book a relaxing get-a-way in the picturesque Flint Hills of Kansas Visit Our Website
CINNAMON GRILLED PINEAPPLE WITH BOURBON GLAZE
Posted by patandkrislarkin in Cooking and Baking on September 26, 2012
What a wonderful dessert! It’s simple to do, looks great and it’s not bad on calories! What more can you ask for! Again, we prepared this at our last cooking class and it was a hit! At least it was as much of a hit as any dessert can be after an afternoon of cooking and eating. But really, it was perfect for that because it it is not too heavy and will work well as the final chapter to any meal.

CINNAMON GRILLED PINEAPPLE WITH BOURBON GLAZE
PREP: 15 MINUTES
GRILL TIME: 12 – 16 MINUTES
SERVES – 8 TO 12
Ingredients:
FRESH PINEAPPLE CUT INTO 2 INCH CHUNKS
8-12 CINNAMON STICKS
Directions:
Using a metal skewer, made a starter hole in the center of each piece of the pineapple, skewer 2-3 pineapple chunks on each cinnamon stick.
BOURBON GLAZE
Ingredients:
½ STICK (4 TABLESPOONS) UNSALTED BUTTER
¼ CUP DARK BROWN SUGAR
¼ CUP BOURBON
½ TEASPOON GROUND CINNAMON
¼ TEASPOON GROUND CLOVES
PINCH OF SALT
Directions:
Combine the butter, sugar, bourbon, ground cinnamon, cloves and salt in a saucepan and boil until thick and syrupy, about 5 minutes.
ON THE GRILL
Preheat the grill to high. Clean and oil the grate. Grill the pineapple until nicely browned on both sides, 3 to 4 minutes per side, basting with the bourbon glaze. Serve at once over vanilla ice cream.
ENJOY!
Thank you for reading!
Kris
Visit Our Website for information about our next cooking class at The Lark Inn. Also, for a great get-a-way in the heart of The Flint Hills of Kansas Check Us Out!
MOM’S MARINATED TOMATO SALAD
Posted by patandkrislarkin in Cooking and Baking on September 18, 2012
This is a fabulous recipe we did at our last grilling class. I know, this is the second recipe from that grilling class and nothing yet has been grilled! Well, the grilled stuff is coming. With our weather so gloriously changing to fall and, our good tomato supply rapidly depleting, I wanted to get this recipe to you as soon as possible. This tomato salad has a rich flavor but not rich body. Actually, it is very light but packed with flavor.
Well, before your tomatoes go bad, let’s get started!

MOM’S MARINATED TOMATO SALAD
PREP:15 MINUTES
INACTIVE PREP TIME: 2 HOURS MARINATING TIME
SERVES –10
Ingredients:
¼ CUP MINCED SHALLOTS
2 GARLIC CLOVES, MINCED
¼ CUP RED WINE VINEGAR
KOSHER SALT
¼ CUP FRESH LEMON JUICE
FRESHLY GROUND PEPPER
2 BASIL SPRINGS, PLUS ¼ CUP CHOPPED LEAVES
1 CUP EXTRA-VIRGIN OLIVE OIL
3 POUNDS RIPE TOMATOES, SLICED ¼ INCH THICK
6 OUNCES PROVOLONE CHEESE
Directions:
1. In a medium bowl, combine the shallots, garlic, vinegar and 1 teaspoon of salt; let stand for 5 minutes.
2. Add the lemon juice and season with pepper. Break up the basil springs and add them to the bowl.
3. Whisk in the oil and let stand for 10 minutes, discard the basil springs.
4. Spoon one-quarter of the vinaigrette onto a large shallow platter. Arrange half of the tomato slices in overlapping circles on the platter and season with salt and pepper.
5. Using a sturdy vegetable peeler, shave half of the provolone over the tomatoes.
6. Spoon half of the remaining vinaigrette on top and sprinkle with half of the chopped basil.
7. Repeat with the remaining tomatoes, cheese vinaigrette and basil, seasoning with salt and pepper between layers.
8. Cover with plastic wrap and refrigerate for 2 hours before serving.
And there you have it! This is excellent just by itself on a plate for for you tomato sandwich lovers out there, try it on some savory toasted bread.
Enjoy!!
As always, thank you for following and for your support!
Kris
For information about our next cooking class at The Lark Inn please Check Our Website. Also, don’t forget that The Flint Hills of Kansas are awesome this time of year. Check us Out and kick back and relax!
GRILLED PEPPER BACON WRAPPED SHRIMP
Posted by patandkrislarkin in Cooking and Baking on August 30, 2012

Grilled Peppered Bacon Wrapped Shrimp
A great recipe and right in line with my motto . . . keep it simple is our Grilled, Bacon Wrapped Shrimp. We did this at our last grilling class and it was such a hit that we have been preparing for all kinds of large functions and people just love it! This is easy and doesn’t take long to grill . . . which is a nice feature especially when the temperatures are still hot!
Let’s grill our shrimp!
PEPPER BACON WRAPPED SHRIMP
PREP: 10 MINUTES
GRILL TIME: 5 MINUTES
Ingredients:
JUMBO SIZED SHRIMP-PEELED 
PEPPER BACON
SKEWERS
Directions:
SOAK SKEWERS IN WATER FOR A COUPLE OF HOURS – PREFERRABLY OVERNIGHT
PEEL SHRIMP AND RUN SKEWER THROUGH TAIL AND BODY
WRAP WITH SMALL SECTION OF PEPPER BACON
GRILL UNTIL JUST BEYOND PINK ABOUT 5 MINUTES – UNTIL BACON IS COOKED THROUGH
That’s it!! It’s done and ready to delight anyone who tastes them!
Thank you for following!
Kris
Please visit our website for information about our next gourmet grilling class or a fantastic get-a-way in The Flint Hills of Kansas!
GRILLED AVOCADO SALAD
Posted by patandkrislarkin in Cooking and Baking on August 16, 2012
 GRILLED AVOCADO SALAD
The grilled avocado salad has been one our favorites since the first time we tasted it in a California grilling class. It is amazing that though you only put it on the grill for a few moments, the grilling process seems to really wake up a new “earthy” flavor in the avocado. A gas or charcoal grill will work fine but as you know we are partial to charcoal as it just gives more of a smoky flavor to your food. Let’s get started!
PREP: 25 minutes
GRILL TIME: 1 minute
SERVES – 8

Ingredients:
10 tomatoes, thickly sliced
4 avocados, peeled, haled & pitted
Extra-Virgin olive oil, for drizzling & adding to juice
1 red onion, sliced
Juice from ½ lemon
½ cup pine nuts
Parmiggiano-Reggiano cheese, shredded or cut into thin wafers
Freshly grated black pepper, optional
Directions
- Preheat grill over medium heat. Cover a large tray or serving platter with tomatoes and set aside
- In another bowl, cover the red onion slices with the lemon juice that has been mixed with a couple Tablespoons of olive oil.
- Place avocado halves on a platter and drizzle with olive oil. Place each half, cut side down, on a hot open grill for about 1 minute. Remove and place on top of the tomatoes arranged on tray.
- Place onions in the empty avocado pit holes. Drizzle the lemon juice-olive oil mixture over the top. Sprinkle pine nuts and cheese over all and grate pepper over if desired.
Now, the best part as always . . . ENJOY!
Thank you for following!
Kris
We will be having another grilling class (possibly the last for the season) at the Lark Inn in Cottonwood Falls, Kansas on the afternoon of September 9. For more information about our cooking classes and/or a great get-a-way in the Flint Hills of Kansas visit our web site: www.TheLarkInn.com
GRILL ROASTED CORN SALSA
Posted by patandkrislarkin in Cooking and Baking on July 11, 2012

We had our first grilling class of 2012 at The Lark Inn last Sunday evening and it was a great success! Since everything . . . I mean everything was grilled, it brought out the male counterparts to the ladies who usually come to our cooking classes!
We learned early on in doing our cooking classes that people anticipate them most of the day before they come. What happens when you anticipate good food? That’s right . . . you get hungry! People showing up for our classes were hungry when they got there. To not have anything for them to nosh on and to have them prepare food for an hour before they got to eat anything was shear torture. After that first class, we learned to always have appetizers our for our guests when they arrive.
This recipe is really quite simple and you could roast the corn in the oven . . . but if you have a grill . . . why would you want to?!?! The smoky flavor adds so much more depth to the corn it truly is worth the effort.
Ready? Let’s make Grill Roasted Corn Salsa!
GRILLED CORN SALSA
PREP: 15 MINUTES
GRILL TIME: 37 MINUTES
SERVES – 8
Ingredients
- 10 large ears corn, husked
- 1/3 cup extra-virgin olive oil, plus more for brushing
- Salt and freshly ground pepper
- 8 vine-ripened tomatoes, about 1 pound total
- 1 cup diced red onion, 1/4-inch dice
- 4 tablespoons red wine vinegar, or more to taste
- 1/2 cup julienne fresh basil leaves
Directions
Brush the corn liberally with olive oil and season well with salt and pepper. Grill, turning every few minutes, until light gold all over and cooked, about 12 minutes. Let cool and cut off the kernels. Discard the cobs.
Core the tomatoes and cut a small X on the bottom of each. Brush with olive oil, season with salt and pepper, and place on the grill, X side down, away from direct heat. Cover the grill and cook until the tomatoes begin to soften but are not cooked all the way through (or they will melt through the grate!), about 15 minutes. Set aside until cool enough to handle, then peel. Cut the tomatoes in half crosswise and squeeze out the juice and the seeds through a sieve into a bowl. Reserve the juices and chop the flesh.
Put the onions in the non-reactive medium bowl and toss with 2 tablespoons of the vinegar. Let marinate until the color changes, about 10 minutes.
Add the chopped tomatoes, reserved tomato juice, onions, basil, and 1/3 cup olive oil to the corn. Toss well. Taste for seasoning and adjust with salt, pepper, and remaining vinegar. The salsa is best eaten the same day but will keep, covered and refrigerated, a day or so.

Serve with tortilla chips or as a topping for tacos.
Now the best part . . . ENJOY!!
Thank you as always for following me. It is an honor for me to share!
Kris
For more information about cooking classes at The Lark Inn in Cottonwood Falls CLICK HERE
LIGHT THOUSAND ISLAND DRESSING WITH CRISPY GREEN BEAN APPETIZER
Posted by patandkrislarkin in Uncategorized on April 26, 2012
 The last cooking class at The Lark Inn was “Lady’s Tea”. We just had a fabulous time! We enjoyed wonderful teas, special appetizers, finger sandwiches and various types of scones. My next several postings will be sharing those recipes with you!

Light Thousand Island Dressing with Crispy Green Bean Appetizer
This recipe makes for a very nice dipping sauce for veggies and as we discovered at one of our “cooking class after parties” a very nice dipping sauce for nearly everything! It will pack a little bit of heat with the chipotle chile pepper in adobo sauce. I only used one and the heat was perfect tending on the almost too warm side.
Ready? Let’s get started!
Light Thousand Island Dressing with Crispy Green Bean Appetizer
PREP: 15 minutes
SERVES – 10
Ingredients
- 1/2 cup low-fat plain yogurt
- 2 tablespoons mayonnaise
- 2 tablespoons nonfat milk
- 2 tablespoons ketchup
- 2 teaspoons Worcestershire sauce
- Kosher salt
- 1 chipotle chile pepper in adobo sauce (optional)
- 3 tablespoons sweet pickle relish
- 3 tablespoons minced red bell pepper
- 8 oz fresh or frozen green beans
Directions
Dressing:
Combine the yogurt, mayonnaise, milk, ketchup, Worcestershire sauce, 1/4 teaspoon salt and the chipotle in a blender; pulse until smooth, about 1 minute. Transfer to a bowl, then stir in the relish and bell pepper.
Green Beans:
Prepare a large mixing bowl with iced water. Bring a pot of water to a rolling boil. Drop the green beans into the boiling water for 2 minutes. After two minutes of boiling immediately remove the green beans and place them into the icy water. This will stop the cooking process of the green beans, retain the vibrant green color and preserve their crunchiness.
Arrange your dressing in a small glass or dish with the green beans in a fun and creative arrangement.
ENJOY!!
Thank you as always for reading and supporting these postings. What a blessing it is to do what I love to do and be able to share it with others!
Kris
For information about our next cooking class at The Lark Inn Guesthouses or a fabulous get-a-way/cooking weekend in picturesque Flint Hills of Kansas please, VISIT OUR WEBSITE. We’ll see you there!
